Moving from Next to Remix
Wondering about rewriting your site from Next.js to Remix? This is how you do it!
I love testing out new technologies. Frameworks, libraries, and even testing out a new language from time to time, all give me a ton of joy – and I always end up, in the process, learning relevant things about the current technologies I work with.
Remix is a comparatively new framework for creating server-side rendered React applications, growing a huge following in the last couple of months. It’s supposedly super-fast, easy to understand, and is built on core web fundamentals like the Fetch API and cache headers.
But is it really a match for the powerful React framework incumbent - Next.js? To find out, I rewrote my (pretty basic) website from Next.js to Remix and tried to compare the results. This article will outline how that process went, what I learned, and what technology I’ll stick with. With a bit of luck, this article will guide you in the same direction, or at least help you make a more informed decision.
The starting point
My website - selbekk.io - is about two years old. I put it together with Next.js, Chakra UI, and Sanity for handling my content. I write a lot of articles (like this one), as well as give a few talks here and there. The site was (and still is) hosted on Vercel, and did pretty well on the Lighthouse test:
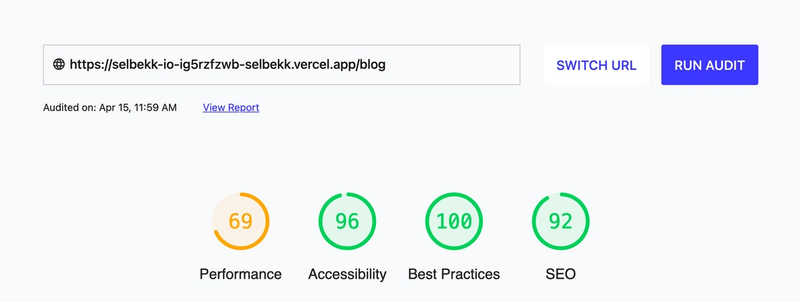
I mean, scoring close to top scores on accessibility, best practices, and SEO without really trying was pretty impressive to me, at least. However, the performance score showed that I had a few things to work on. Drilling down further, I found quite a few places I could improve:
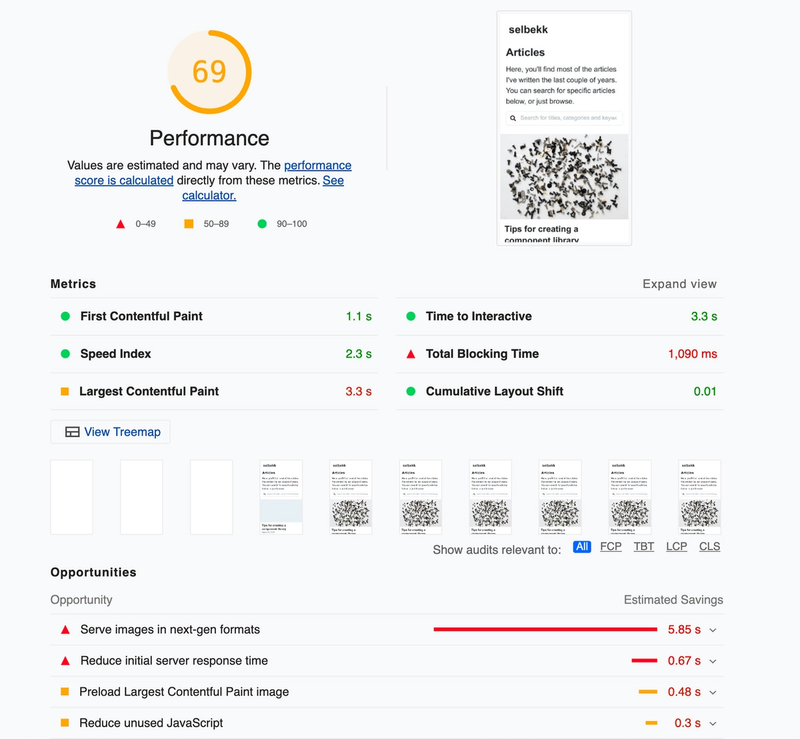
Note that there are definitely a few things here that could have been addressed in the Next implementation. That won’t stop me from rewriting everything to my new favorite framework, though!
Getting started with my rewrite
My website’s code is open source. It’s a monorepo consisting of two applications: a Sanity Content Studio for handling my content and the website for showing it to others. Those two applications can be found in the /studio and /web folders, respectively.
The first thing I did was to run Remix’s wonderful bootstrapping tool with npx create-remix. I put the generated content in a new folder /remix, and chose Vercel as my deployment target.
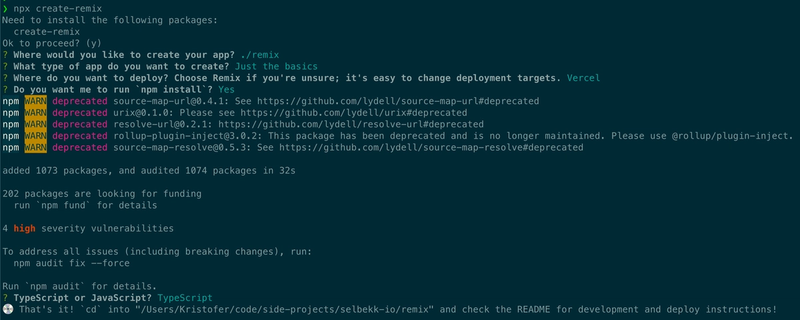
Once the tool was done generating and installing dependencies for me, I could spin up a local dev server with some “hello world” content:
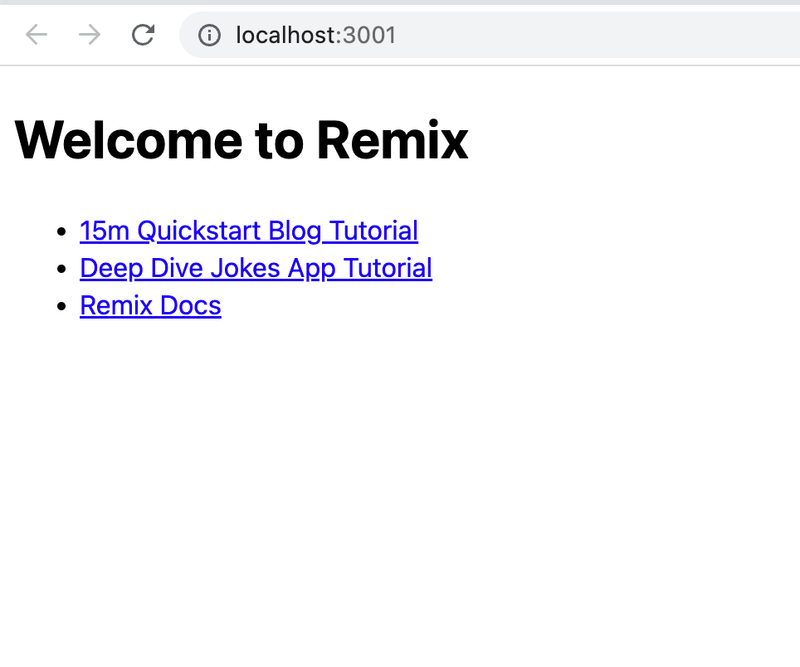
Not bad for the first few minutes of coding!
Setting up Chakra UI
I’ve been using Chakra UI for creating the interfaces of my apps and websites for a while. It’s wonderful to use, handles much annoying accessibility stuff, and makes me highly productive. Setting up Chakra UI in Next.js was pretty straightforward. You had to create a _document.tsx file (oh yeah, I use TypeScript, you should too), which would wrap your application in a ChakraProvider component, and you’d be good to go.
With Remix, the story was pretty different. Since you have total control over the entire document tree and the server and client entry points, you need to do a bit more manual work. Luckily, the talented people on the Chakra UI team have done a great job writing what you need to do. Instead of just parroting whatever they wrote, I suggest you look at their official guide to setting up Chakra UI with Remix.
Even with this guide, though, this was by far the most frustrating part of moving to Remix. There are a lot of concepts like style caches and chunks that I just hadn’t had to deal with before, and understanding the intricacies of how CSS-in-JS works while onboarding a new framework was a bit much for me. However, following the guide did indeed work as it should – let’s hope somebody figures out a simpler abstraction in the future.
Porting my features
Once Chakra UI was set up and running, we could start with the fun stuff of porting existing Next.js-based code over to Remix. I began by copying the entire /web/features catalog to /remix/app/features. This is where 80 % of my code lived, and handles everything from searching content to displaying it correctly.
I didn’t have to change much as I moved these files over. That’s a good sign - having most of your code be framework agnostic makes it easy to do experiments like this. I did have to change all my internal links. Where I previously imported the <Link /> component from next/link, I now imported <Link /> from remix. Their APIs are slightly different, and I ended up rewriting code like this:
<Link href="/blog" passHref>
  <ChakraLink>Read my blog</ChakraLink>
</Link>
into this:
<ChakraLink as={Link} to="/blog">
  Read my blog
</ChakraLink>
Remix’s approach is a much more ergonomic API, so I was only so happy to do this refactor. Besides that, I had an <Seo /> component that used Next’s <Head /> component. I ended up just removing this, as Remix has different APIs for adding meta tags to the head of my component.
Porting my pages
Next up was the most interesting part - rewriting the actual pages or routes. This is where I interacted most with the frameworks, as this is where all of the data fetching and layout logic is.
One thing was nice: both Next and Remix use file-structure-based routing, which meant that the file structure could stay pretty much the same. I had to rename a few files from [slug].tsx to $slug.tsx, but that was about it.
Changing the data fetching was also pretty straight forward. Where I was previously using Next’s getStaticProps function, I could now basically rename it to Remix’ loader function, and be good to go. Here’s a code example for fetching all articles in Next:
const getStaticProps: GetStaticProps = async () => {
  const articles = await sanityApi.getAllArticles();
  return {
    props: { articles },
  };
};
And here’s the same code in Remix:
const loader: LoaderFunction = async () => {
  const articles = await sanityApi.getAllArticles();
  return json({ articles });
};
(Note – the actual code diff looks slightly different, as I didn’t bother with creating an abstraction around the Sanity API. I used a third-party library for integrating Next with Sanity, which I ditched in the rewrite)
I could also delete all getStaticPaths functions, as they weren’t needed anymore 🎉
From <Head /> to export const meta
The next thing I had to do was get rid of my Seo component. Previously, that was the thing that made sure the title and other meta tags were set correctly! Instead of a <Head /> component, Remix lets each route export a function called meta, which gets the data from the matching loader function, and lets you return an object with names and values. Here’s my meta function for each article page:
export const meta: MetaFunction = ({ data }) => {
  const { post } = data as LoaderData;
  const metadata: Record<string, string> = {
    title: `${post.title} - selbekk.io`,
    description: `${post.textExcerpt}`,
    "og:image": getImageUrl(post),
    "og:image:width": "1200",
    "og:image:height": "627",
    "og:type": "article",
    "og:author": "Kristofer Giltvedt Selbekk",
  };
  if (post.canonicalUrl) {
    metadata.canonical = post.canonicalUrl;
  }
  return metadata;
};
Sharing layouts with pathless layout routes
One of Remix’s most powerful features is its concept of nested routes. One layer of routes can apply a part of a layout, while another, deeper layer can add the next part of a nested layout. Unfortunately, my site doesn’t have that kind of design, but I still had a common header and footer for everything except the front page.
To solve this, I had to use something Remix calls “pathless layout routes”, which lets you apply a common layout to anything in a folder with leading double underscores. I created a new file __main-layout.tsx that looks like this:
export default function MainLayout() {
  return (
    <Flex flexDirection="column" minHeight="100vh">
      <SiteHeader />
      <Box flex="1">
        <Outlet />
      </Box>
      <SiteFooter />
    </Flex>
  );
}
Next, I moved all routes except the default index route into a folder named __main-layout to have the layout route applied to them. It looks a bit wonky, but it works like a treat for simple use cases like mine.
Deploying the rewrite
With both the features and pages ported, there was nothing left to do but delete the old /web folder and rename the /remix folder to /web. Everything seemed to work pretty nicely locally, at least.
Next, I wanted to deploy my code to my current site. To make this work, I had to change a setting in Vercel’s settings dashboard, to let Vercel know that they just one happy Next.js project to the Remix camp:

That done, I could now deploy my site and test it out live! I couldn’t wait to see the enormous improvements I had made to my Lighthouse scores!

That was… underwhelming. I sure hoped for a better improvement than that!
Time to optimize
It turns out, Remix isn’t pure magic, and it does leave a lot of power in the hands of you –the developer– to make sure the site is as fast as possible.
The first thing I ended up doing was setting some cache headers. That means I can use a CDN to cache a precompiled version of my site! With Vercel, that happens automatically for you 🥰 To do this, I opened the root.tsx file and added the following:
export const headers: HeadersFunction = () => {
  return {
    "Cache-Control": "s-maxage=360, stale-while-revalidate=3600",
  };
};
This sets the Cache-Control header for all requests, caching all pages for an hour, and specifying that you could get a stale response while fetching a new response in the background after 6 minutes.
If you’re not familiar with caching headers, that’s fine. I wasn’t either, or had at least forgotten about it since the last time I had to deal with it directly. Luckily, the MDN documentation is very easy to understand, and gave me the overview I needed to get started.
Some responses will probably not change as much - like my landing page (it basically never changes), so I added a different headers function to the /routes/index.tsx file:
export const headers: HeadersFunction = () => {
  return {
    "Cache-Control": "s-maxage=86400, stale-while-revalidate=604800",
  };
};
Same header, much higher values. I could do this for all routes (listing all articles might want to have a shorter cache expiration than the article page itself), but I left it like this for now. I’m sure I’ll end up tweaking this going forward.
I also fixed a few accessibility bugs (some weak contrasts and messed up heading structures) and changed all my images from .jpg to .webp (Sanity makes this super simple!).
Finally, I removed a call to Sanity to fetch site settings on each request, in favor of just hard coding it. That might not have been the right choice for all pages, but definitely for me.
With all of those tweaks merged to my main branch, I re-deployed and re-tested:

Now that’s neat!
Check out the finished result at selbekk.io.
Lessons learned
Rewriting my website from Next.js to Remix was a lot of fun. It made my website faster, it made the code a lot easier to understand, and I got the opportunity to learn caching headers. Not bad for a weekend’s work.
Remix doesn’t necessarily make your website fast by default, but it makes it easy to optimize step by step. It removes a lot of the magic Next did for me, and made me understand a lot of the underlying concepts a bit better.
I hope this article helps inspire you to rewrite your own projects in Remix, and learn some web standards by default.